

People are divided about whether AutoCAD or Revit is a better design solution. It is obvious that the industry is moving ruthlessly towards the 3D design environment, but still, there is a high demand for 2D documentation. This tutorial is about defining AutoCAD annotative text and dimensions to match Revit annotation tools.
Text Types/ Styles
Revit Text Types
Review the Revit text types that are loaded into a project. From the Annotation tab, select the Text tab and use the arrow in the lower right corner to expand it.

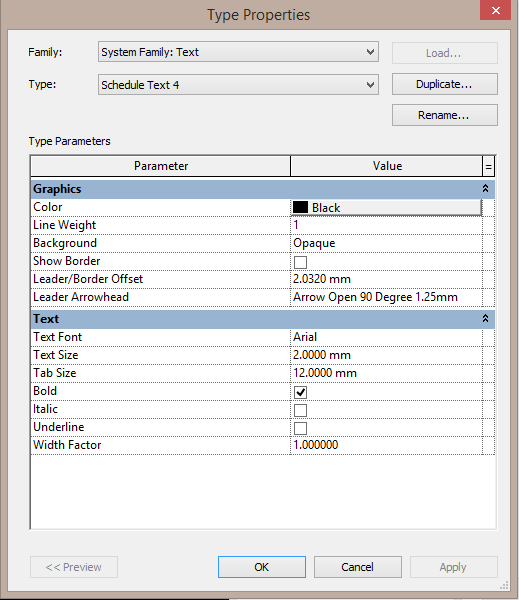
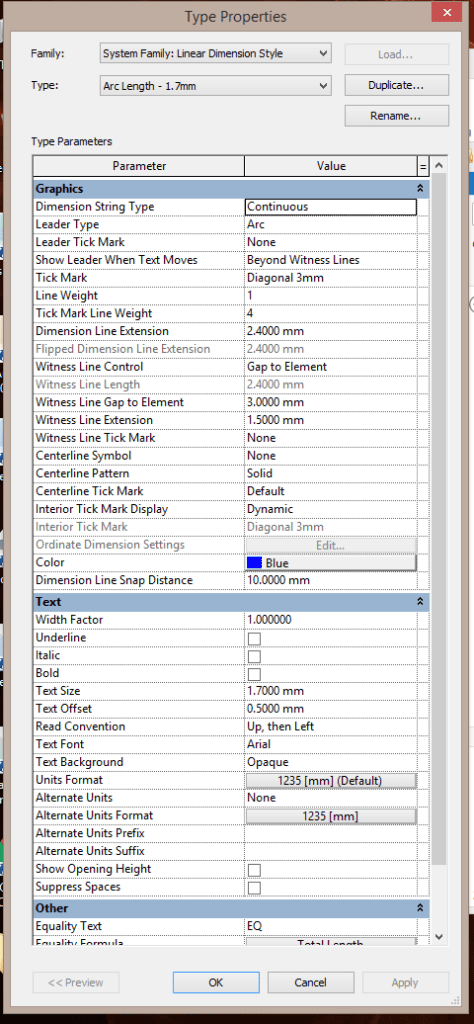
The Text Type Properties dialogue will appear and you can review the following key settings:
- Colour – sets the colour of the text;
- Lineweigh – sets the lineweight of the text object;
- Background – tells the text to mask objects behind the text or keep the text transparent;
- Show Border – draws a box around the text;
- Leader/Border Offset – sets the distance from the edge of the text to the edge of the border;
- Leader Arrowhead – sets the default leader that will be placed;
- Text Font – sets the font used;
- Text Size – sets the font printed height on a sheet of paper;
- Tab Size – sets the spacing in the text;
- Bold/Italic/Underline – set additional behaviour for the type;
- Width Factor – expands the default width of the text element.
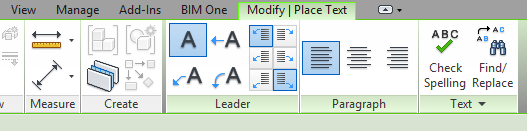
Revit text is placed like AutoCAD text. Select the command from the Annotative tab if you want to select a leader, set justification, check spelling and find/replace text as needed.
When creating names for Revit types or AutoCAD styles, make sure you follow the same naming behaviour from AutoCAD.
AutoCAD Text Styles
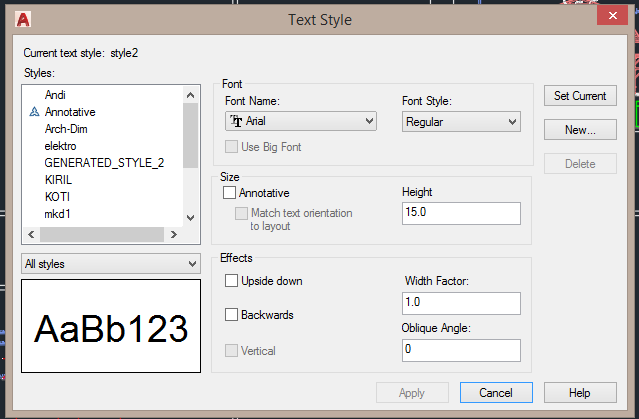
AutoCAD text styles are defined using the STYLE command. You can set the following style settings:
- Font – sets the font used;
- Font Style – adds options for regular, bold or italic;
- Annotative – tells the text to respond to the scale assigned to model space and the paper space viewpoint;
- Paper Text Height – assigning this value is not required – set it to get the same behaviour as the Revit text type;
- Effects – include Upside down and Backwards;
- Width Factor – expands the default width of the text element;
- Oblique Angle – adding behaviour to traditional SHX files.
When a drawing file is linked into Revit, the style is not imported. It is imported when the drawing is inserted as a non-linked file, or a linked DWG file is imported using the Manage Links tab. The style is added to the drawing based on the original drawing name and text font used – not the Style name.
Dimension Types/ Styles
Revit Dimension Types
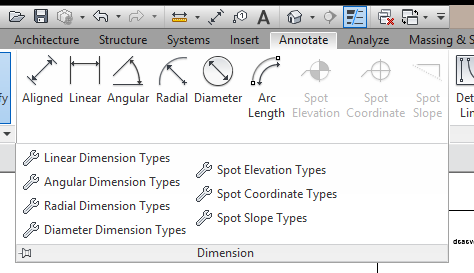
From the Annotation tab, select the Dimension tab. You can see that the dimension types are separate entities, based on how the dimension is used – linear, angular, radial, diameter and other individual types within a project.
The type properties are on one palette:
- Graphics – control how parts of the dimension linework is defined;
- Text – controls the text information;
- Other – includes the equality features, which is unique to Revit. This feature allows you to use the dimension to space items evenly across a distance.
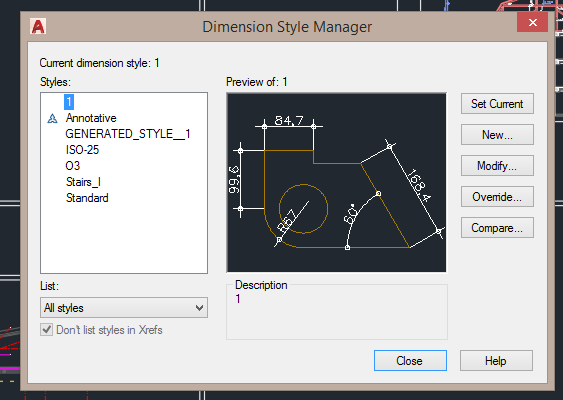
AutoCAD Dimension Styles
In AutoCAD, the dimension style can be accessed using the DIMSTYLE command. All types can be edited, but linear, angular and radial dimension settings are defined by one style.
- Lines – controls the linework for the dimension, regardless of the type. You should check Extend beyond dim lines – this matches the Revit Dimension Line Extension setting in the type.
- Symbols and Arrows – control the arrowheads, centre marks and dimension breaks; and also the arc length, radius jog and linear jog settings – which are not available in a Revit linear dimension style.
- Text – controls the text information. Selecting an annotative text style will automatically follow the text style, while the Revit dimension type still requires setting the font and size.
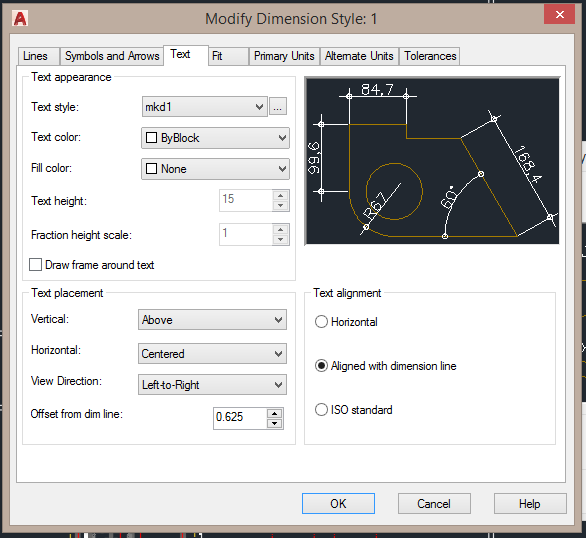
- Fit options – include the key settings for making the entire dimension style, with all its size/offset and length values.
- Primary and Alternate Units – which set format, precision and more are controlled by a single tab in AutoCAD. While these settings are specific to a project in Revit, you can add specific items in AutoCAD too.
- Tolerances – provides additional settings that are not exposed in Revit, but they are typically used in manufacturing drawings more than in building design projects.
As with text, make sure that the dimension settings are matched between the Revit type and AutoCAD style. You should always use True Type fonts. If a drawing is inserted into a Revit drafting view or other view with an SHX based font, it will still be recognized as text, but when the same view includes an exploded drawing and is exported back to AutoCAD, the text becomes line segments.
With so many productive AutoCAD users, sometimes it can be tough to get them into the Revit way of thinking. One way to get these users on board is to help them relate AutoCAD features to Revit tools, in terms to increase their productivity.